How to migrate mailboxes from Webmail to IMAP Server?
When you migrate to an IMAP Server from webmail account,your old emails will not be available unless you migrate them. Here,we explain an easy method for migrating Webmail emails to IMAP Server.
Instant solution for Webmail to IMAP Migration
IMAP to IMAP Migration third-party tool is the instant and easy to execute solution for transferring Webmail emails to IMAP Server. The utility offers a simplified interface plus multiple advanced features for effective data migration.
No direct ways are available for Webmail mailboxes to IMAP migration therefore,professionals suggest this third-party tool for error-free and smart migration.
Instructions to follow before Webmail mailboxes to IMAP migration
Before you migrate Webmail mailboxes to IMAP Servers,it is mandatory to find the correct IMAP settings otherwise you won't be able to complete the data migration process. Follow the steps to find the correct IMAP settings –
- Login to your webmail account.
- Go to the account picture and select Configure Mail client
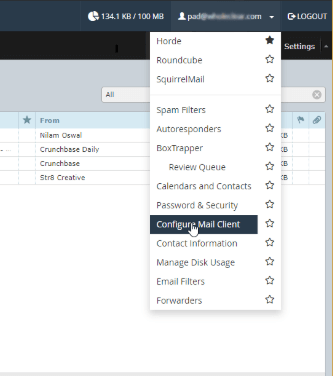
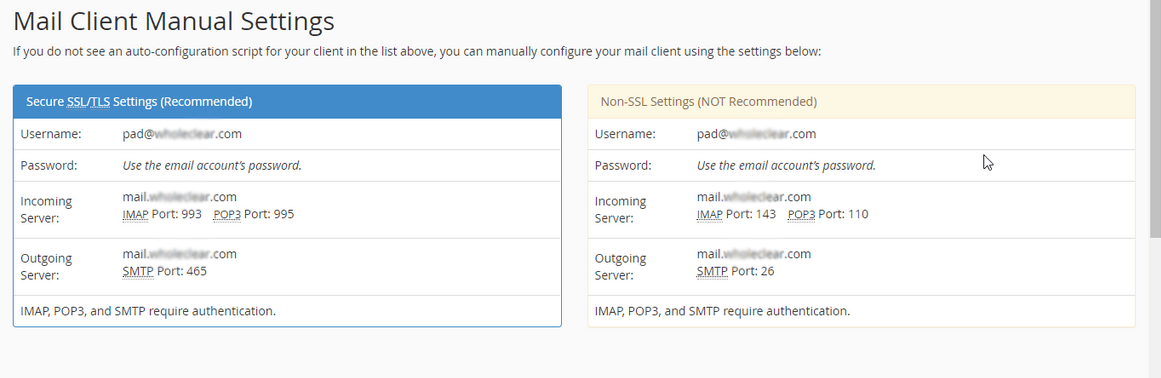
- Find Incoming Server details and copy these details that you need to authorize your webmail account.
Procedure to migrate Webmail to IMAP Server
Follow the step-wise guide to transfer Webmail emails to IMAP Server –
Step 1. Install and Start the software
Initially,download and install the software on your Windows PC.
Step 2. Provide webmail account details
Now,you need to authorize Webmail account. For this,enter the following details – host address,username and password of your webmail account. Then,click on Authenticate Me button. This will connect the software with the defined webmail account for data migration.

Step 3. Authenticate IMAP account
Similarly,provide targeted IMAP account host address,username and password to authenticate IMAP account in which you want to migrate the data. After providing the details,hit Authenticate Me button.
Step 4. Selection of mailboxes of Webmail account
Now,choose all mailbox folders or desired folders of Webmail account. You can choose folders like Inbox,sent items,drafts,etc.
Step 5. Apply Filters for data migration
You can use "Apply Filters " option and transfer selected data from Webmail to IMAP account using date range & other filters.
Step 6. Select targeted IMAP account folder
Select targeted folder option and all webmail data is exported to respective folders in IMAP account or you can easily create a new folder for saving Webmail mailboxes.
Step 7. Start migration
Finally,hit Start Transferring button and within a few minutes,webmail mailboxes are migrated to targeted IMAP account.
Why this third-party tool is recommended to use?
Several third-party solutions are available in online market but one should pick a solution that can smartly and intelligently perform data migration. The software we provided you here has lots of valuable features due to which it is recommended to use by experts.
- Smart,instant,and 100% safe data migration
- Permit using advanced filters for migrating the database
- Direct migration facility is provided within a few simple clicks
- Do not impose any limit on the size of mailboxes for migration
- No demand for any external tool installation
- User-friendly so can be easily utilized for all users without any complexities
Summing Up
After going through this article,you don't need to look forward for webmail emails to IMAP migration any more. The third-party solution discussed in this blog will help you to easily complete the data migration process. You can go through this software with the demo edition and for any assistance,contact support team 24*7.