Migrate OLM Files to Office 365 or Export to Outlook PST – Complete Guide
Nowadays,users are moving to cloud-based applications in large numbers. Office 365 is one of them that is popular among users. Since Microsoft provides no direct way to convert OLM files to Office 365. So,a user needs to convert OLM files to PST format first and later on import PST files to Office 365. Outlook is one of the commonly used email clients among all MS Office applications. Outlook comes for both Windows as well as Mac users. Outlook for Windows works with PST file format and Outlook for Mac works with OLM files. In case,you are a Mac user who has decided to switch to Windows and want to save OLM file in Office 365 without using Mac system,then you have to convert OLM files into PST format and then import Outlook PST in Office 365.
Conversion of OLM files into Office 365
First of all,convert OLM files to PST format and then import Outlook PST file in Office 365. There are two methods which are described in this article to perform the conversion.
Manual Technique
Steps of conversion for OLM to Office 365
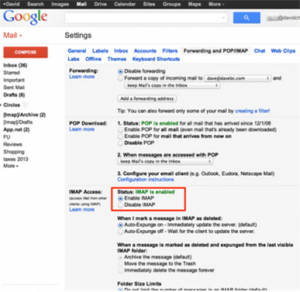
1. First of all,set up an IMAP email account. For this,open your Gmail account to set IMAP account. Enable IMAP option.
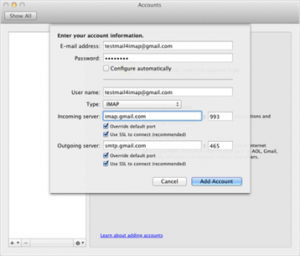
2.Configure OLM file with Gmail account.
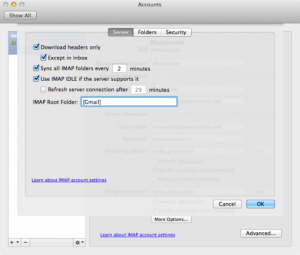
3. Create a Gmail label and start synchronizing OLM file with IMAP account.
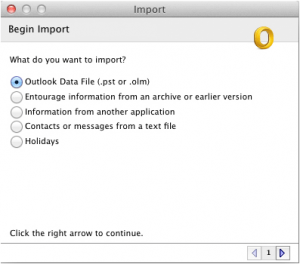
4. Move all data from OLM file to IMAP mailbox. You can move those emails into Outlook Data file (.pst)
Steps to import Outlook PST file to Office 365
Microsoft has provided a tool named PST Capture Tool that helps users to capture PST file to migrate data. For this you need to locate required PST files on your network and then you can easily import PST files.
- Download and Install PST Capture Tool on your machine.
- You will find two options 'New PST search ' and 'New Import List'
- Select 'New PST search ' and choose one client computer in your domain
- In the next window,choose manual or schedule the scan and click Finish
- Go back to PST Capture Tool and check the machine name and select Search All Now button
- After scanning,select the server and PST file. Click on new Import List and select Cloud Import List
- Enter Office 365 account credentials
- Check all setting options
- Configure Message Import option
- Select Archive Mailbox option to directly import PST to Online Archive mailbox
- Go to General Settings and click Ok
- Choose Set mailbox option. A dialog box will appear to show mailboxes available to migrate content of PST file. Select a mailbox.
- You will see PST file of selected mailbox
- Click on Import all Now option
- Now,login to Office 365 account and launch Outlook (OWA). You will be able to see added PST on the screen.
Why manual solution fails?
There are various issues that a user can face with the manual solutions –
- A very lengthy and complicated process with manual technique
- Chances are more of getting errors
- No data safety,a user may use data loss and corruption
- Complexity level is there for non-technical users
Alternate way to transfer Mac Outlook files to Office 365
If you don't want to go for a manual solution or finding another simple way to export OLM files to Office 365. Here is an alternative way for you in the form of a professional solution.
First,you need to export OLM files to PST format using OLM to PST Converter. The software is a reliable one and perform speedy conversion with some simplified steps. It is available for Windows users as well as Mac OS users. You can pick any one as per your suitable platform.
Steps to convert OLM to Office 365 with Advanced Converter
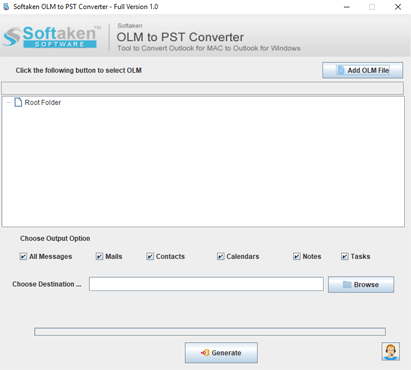
1. Firstly,download,install and run the software on your system (Mac or Windows)
2. Click on add OLM file and choose OLM file of any size for conversion.
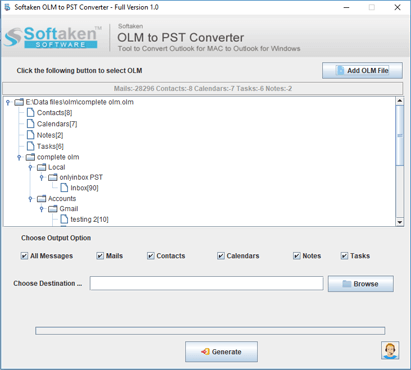
3. Choose Output options whom you would like to convert.
4. Set an output destination path to save the outcomes.
5. Click on the Generate option to start the conversion process.
Import PST file in Office 365
To import Outlook data file into Office 365,you can download another swift application from Softaken named PST to Office 365 Migration which helps you to move PST files to Office 365 with some simplified steps without Outlook installation.
Steps to migrate PST file to Office 365
The migration process is completed into four steps –
1. Freshly,download and install Softaken PST to Office 365 Importer Tool.
2. Select Personal Storage File (.pst) with the Browse option.
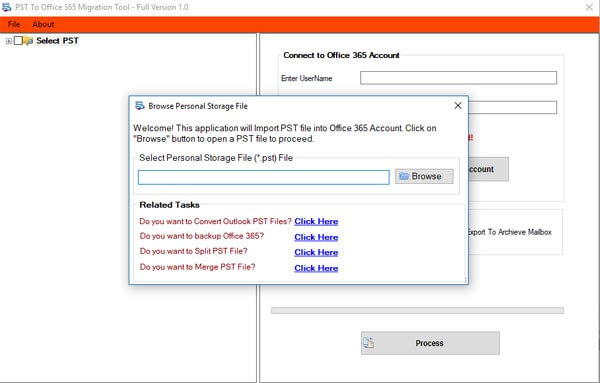
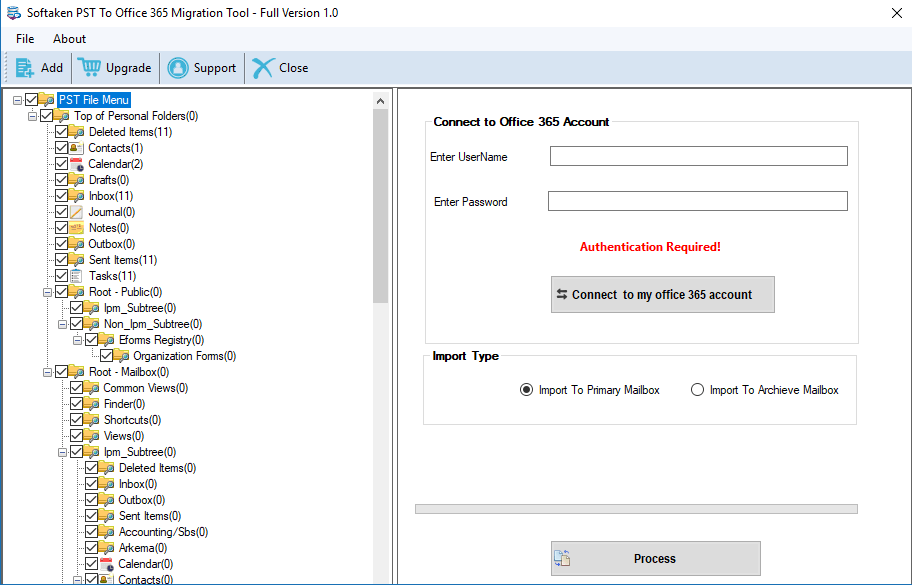
3. Provide Office 365 username and password so that the software connects with your Office 365 account.

4. Choose an Import Type option – Primary Mailbox or Archive Mailbox.
5. Click on the Process button and this will start the import process.
Final Verdict
After going through this article,you will be able to understand which method suits your requirements. Generally,professionals suggest automated solutions which are safe to use and provide you quality results all the time. The software is designed by keeping all type of users. The users are free to test a free version of the utility so that they can judge the utility before investing in it.