Simple and Complete Method to Export Office 365 Mailboxes to PST
With Microsoft Office 365,the users can access their mailboxes anytime on any device. Side by side PST is the desktop-based Outlook's storage file and there are several users who are searching for the solutions to export Office 365 mailboxes to PST format. Here in this article,we will talk about the several solutions using eDiscovery PST Export Tool,PowerShell misconception to export Office 365 online emails and also a brilliant third-party tool.
Why do we need to Export O365 Mailbox Items?
See for the reasons and scenarios to export Office 365 items –
- Want to keep emails and documents for long period of time
- Data loss because of accidental deletion of O365 account items
- Ransomware attack results in encryption of business account data
- Hacking of Office 365 admin account by hackers or unauthorized person
- Permanent deletion of O365 user or ex-employee account
Instant Solution to Access Office 365 Data into PST
There are two methods that can help users to export to PST from Office 365.
- Using eDiscovery PST Export Tool
- Third-party Software
Export PST from Office 365 using eDiscovery Method
eDiscovery Content search is the manual method available but it needs some requirements. Check below for the requirements.
Essentials to use eDiscovery Content Search & Export Utility
- Needs Windows 7 OS and later versions to export search result to PST.
- Latest version of Internet Explorer or others are necessary to be installed.
- Permission must be assigned for Office 365 OWA.
- Need .NET Framework 4.5 or later version to be installed.
- Discovery Management group
Step by Step Solution to Export PST from Exchange Online using eDiscovery PST Export Tool –
- First of all,login to Office 365 account and launch Microsoft Admin Center.
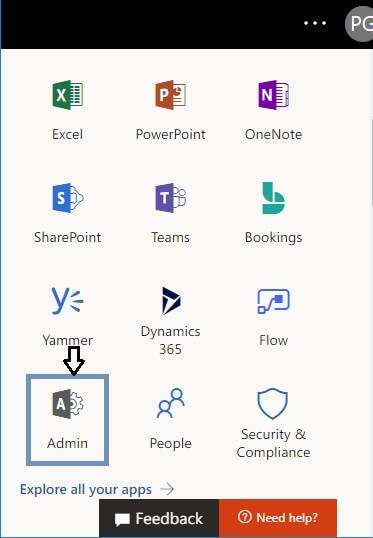
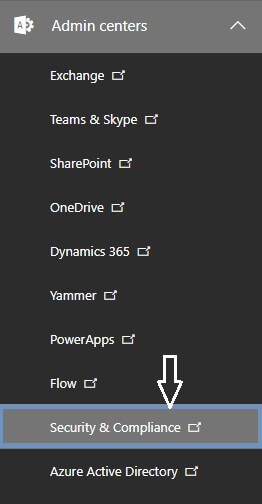
- Under the Admin centers,click on the Security and Compliance option.
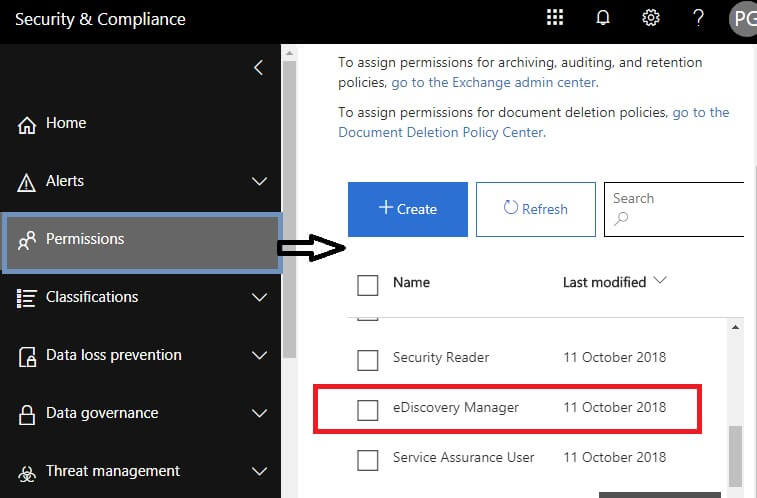
- In Security and Compliance section,select Permissions option and drag to eDiscovery Manager.
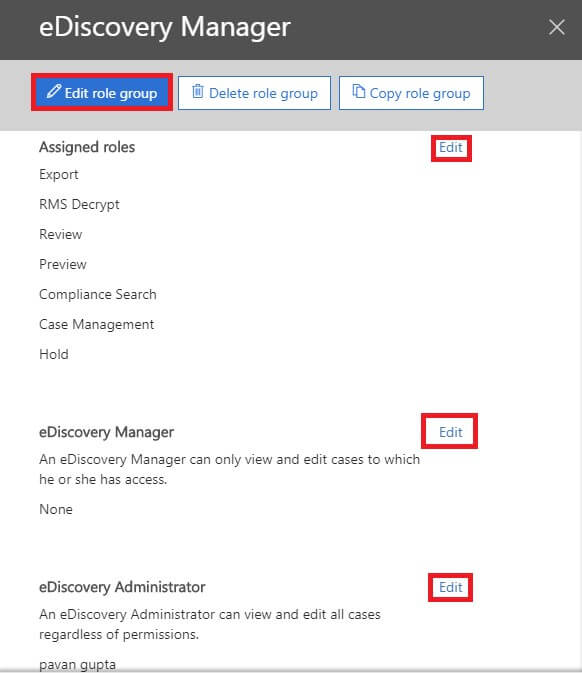
- Click on Edit role group to add important roles which are required for the Discovery Management Group.
- Generally,the role group is assigned to roles – Export,RMS Decrypt,Review,Preview,Case Management,Compliance Search and Hold.
- If the Export role is missing ,you can click on the Edit role group and add the same.
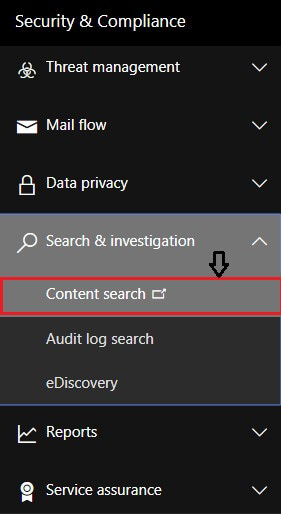
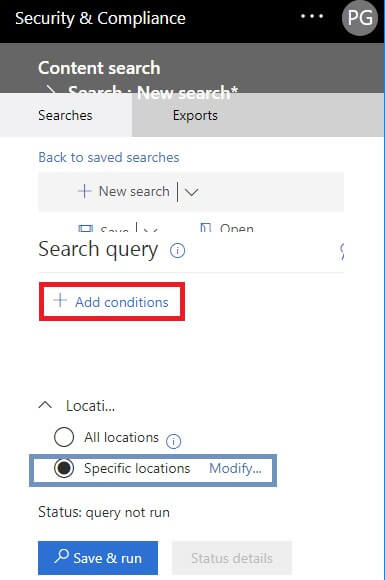
- Now drag down to Search and Investigation. Then,select the Content search option.
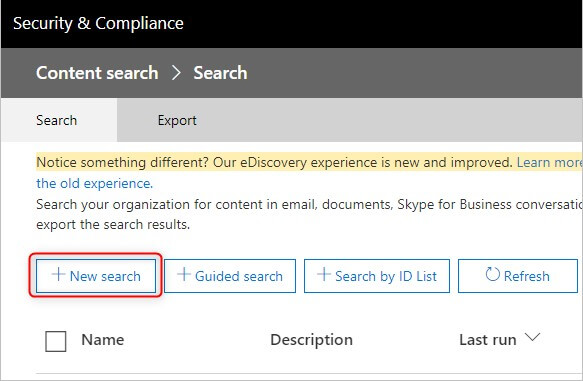
- In the new window,click on the New Search option which is available in the latest version of eDiscovery Content search.
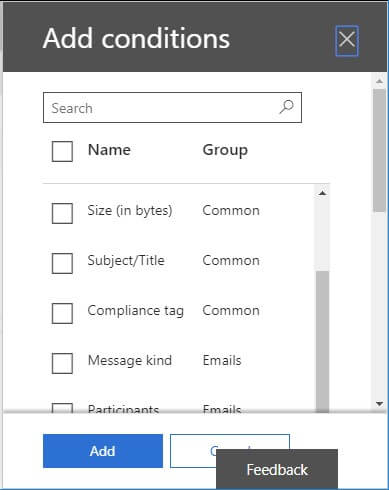
- After that,specify the data to be exported to PST from O365. The user can Add Conditions to make Office 365 search process more precise as per the need. The user can see the multiple items available to filter search emails & other items.
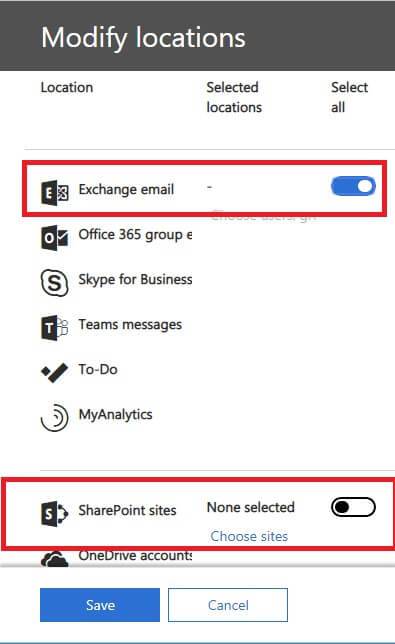
- Select Specify locations and Modify.
- Choose emails or specify mailboxes using Choose users ,groups option.
- You can export mailboxes from SharePoint and Public folders by enabling Public folders option.
- The search option provides many filtering options which helps you to export selected content.
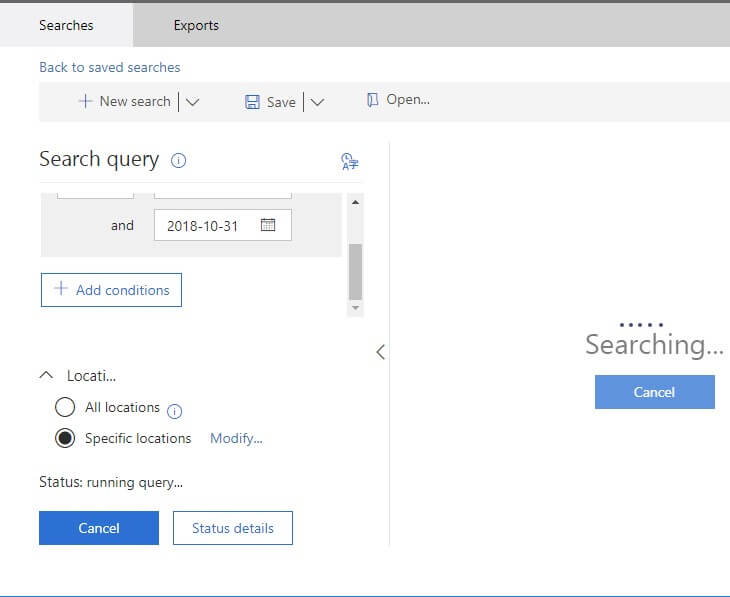
- In order to export Outlook 365 mailboxes,do not add any conditions or keywords. Click on and Run button.
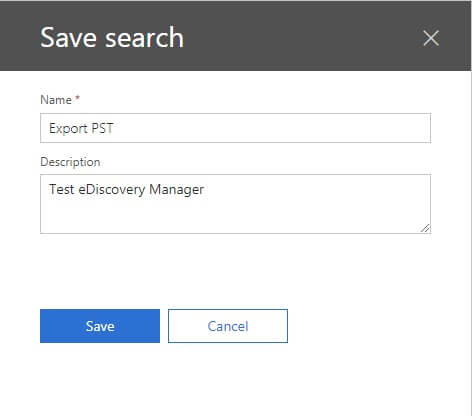
- The search will start in the background once you click on Save button.
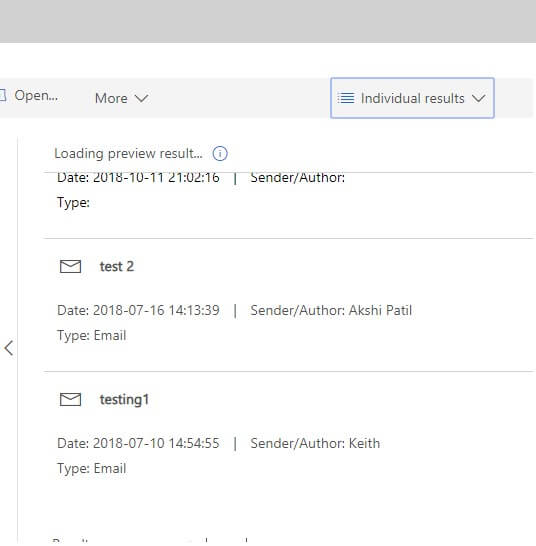
- Preview all search results before exporting them.
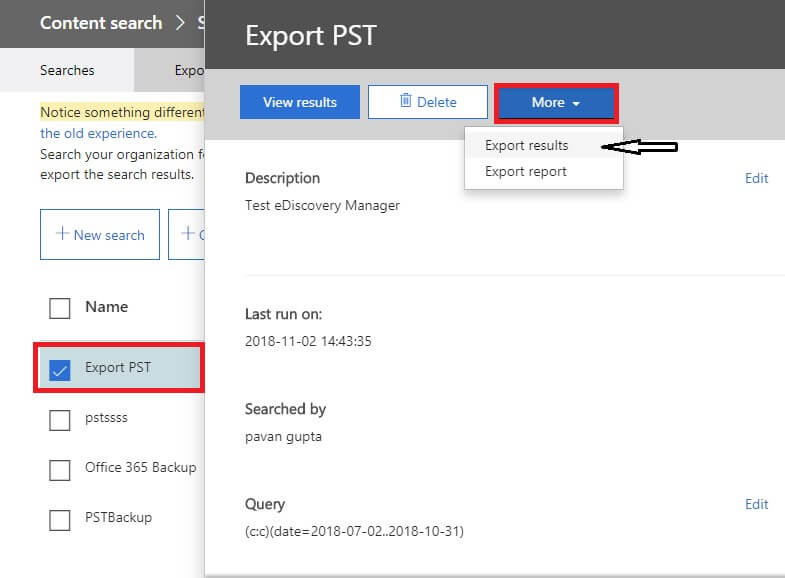
- Go back to saved searches and select folder name to export O365 Online to PST. Select More option and choose Export results option.
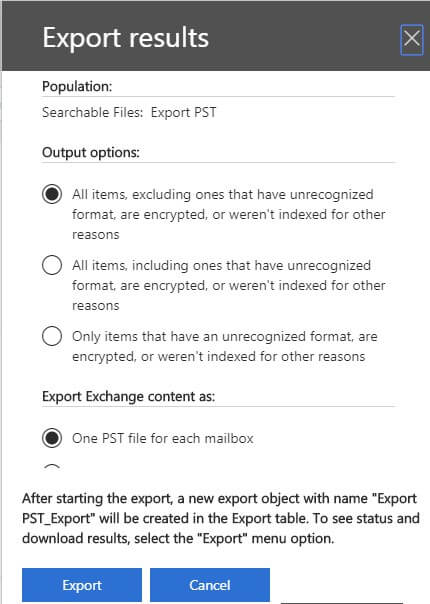
- In Export results wizard,select the radio button. Also,make sure do not check enable deduplication option unless there is need to search results which are required to export.
- Once the settings are done,click on the Export button and then close the tab.
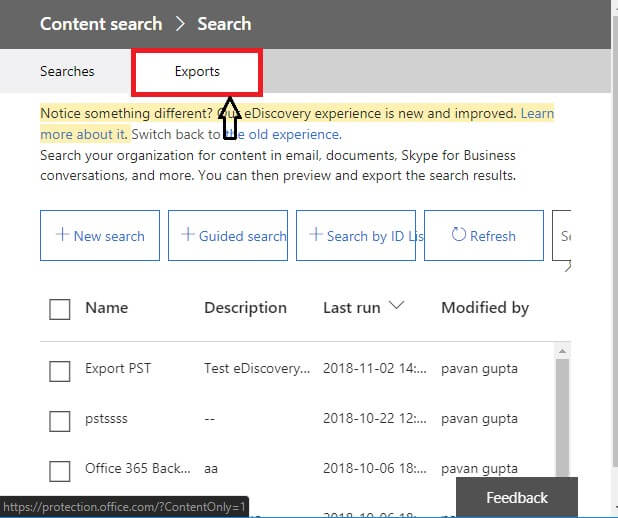
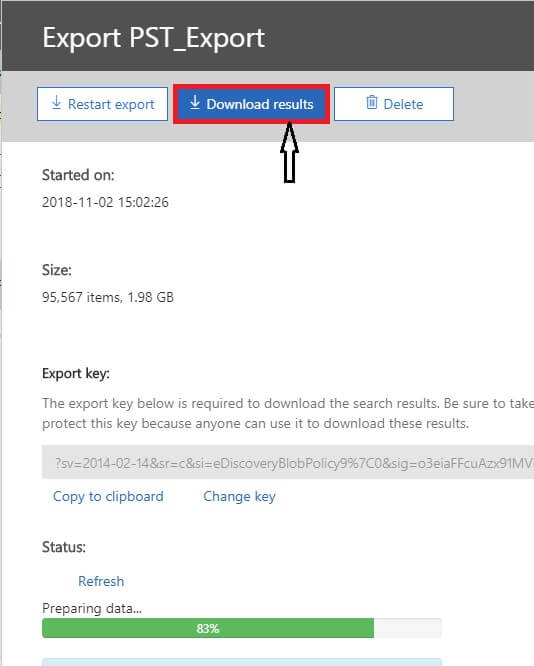
- To check the export progress,go back to searches and click on Export tab.
- Click on Download results option to download before export process gets completed.
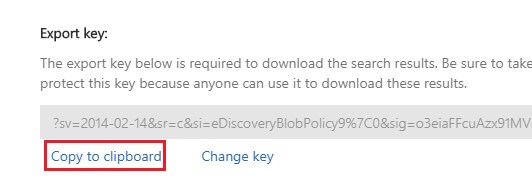
- Click on Copy to clipboard to copy the Export key.
- Paste the copied export key under the Paste field and select the desired folder to save PST file.
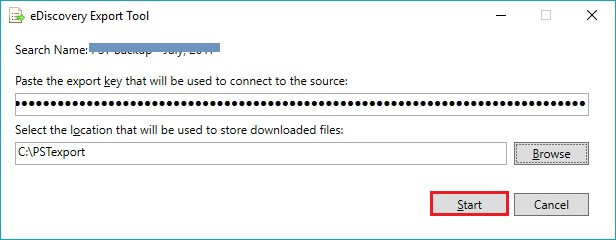
- Finally,click on the Start button to commence the export process.
Errors faced while Exporting O365 Mailboxes to Outlook Data file i.e. PST via eDiscovery
- Can't start the application error in the end.
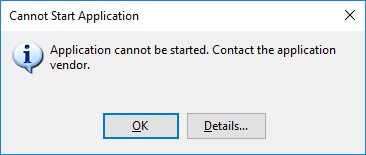
- You can't start eDiscovery PST Export Tool from Admin Centre in Office 365 Online.
Exporting using Third-Party Tool/ Professional Tool with Few Clicks
Users often face issues with the manual methods. Considering the needs of the users,we recommend to use Softaken Office 365 Export Tool. This is a full remedy to perform export from Office 365 to EML,EMLX,MSG,MBOX,and PST formats quickly without having any technical expertise. The software does not impose any restriction as there were in the manual methods. Plus,the application works with all Windows Operating systems.
See how does the Software Exactly Work?
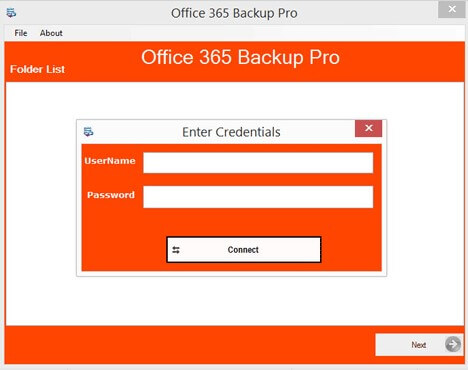
- Initially,download and install the application on your system and enter credentials of Office 365 account. Click on button. Then,click the Next button.
- The tool displays the folder hierarchy for the respective ID. Click Next option.
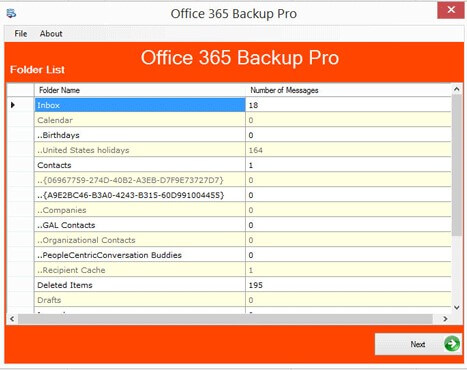
- Select the required folder whose data you want to export.
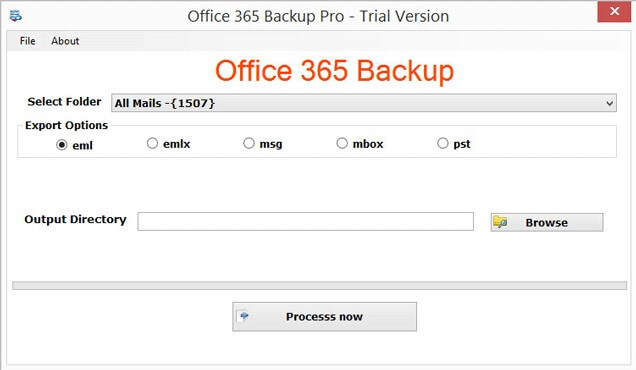
- The application provides 5 different options i.e. PST,EML,EMLX,MSG,& MBOX to export mailboxes from Office 365.
- Use the Browse button and specify an output destination to save the exported results. Hit the Process Now button to start the export process.
Misconception:Export PST from O365 via PowerShell
There is no such option that can export PST from Exchange Online via PowerShell. There is no method like MailboxExportRequest command to do this. Only a free solution is available named eDiscovery PST Export Tool which we have discussed in this article along with its errors. Therefore,for easy and quick solution Professional Tool is suggested to use.