How to grant full access permission of mailbox to another user
It is not an easy process to grant mailbox access permission to any other user by the IT admin. Being a complex process, it requires complete attention and knowledge of the facts. However, there are many ways that can help in executing these kinds of tasks by avoiding things that might create trouble during the process.
For an example, if we consider any kind of situation say Email Migration, giving access permission is an important and a main point since you will require access permission for all the mailboxes that will help to migrate all the data in the new server. If you do not have access permission, it would not be possible for you to shift any amount of data from one server to another.
For this purpose, we have come up all those necessary steps that will help you to grant access permission of mailbox to another admin. These steps also include crucial details of a freeware that helps you to grant complete access permission to another admin and migrate multiple mailboxes at once in another server
Methods to Grant Full-access permission:-
You will find mainly two methods that help in granting full access permission of mailboxes to another IT admin or user. Let us understand each of them in detail.
Method 1 : Using Exchange Admin Center
- You have to enter all the credentials and Login to office 365
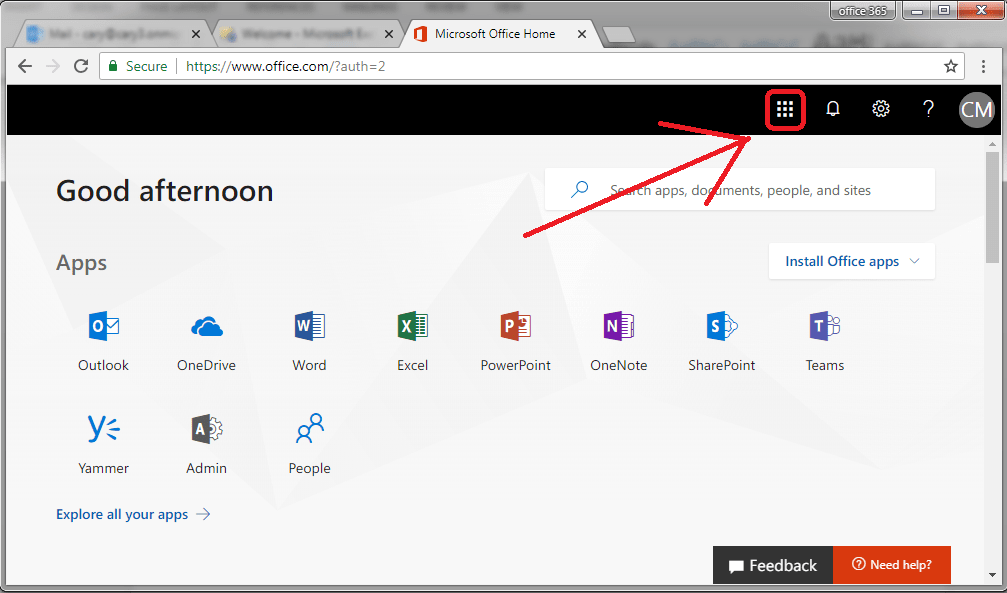
- On the top-right corner of the page, you will find ‘App Launcher’, Click on this tab
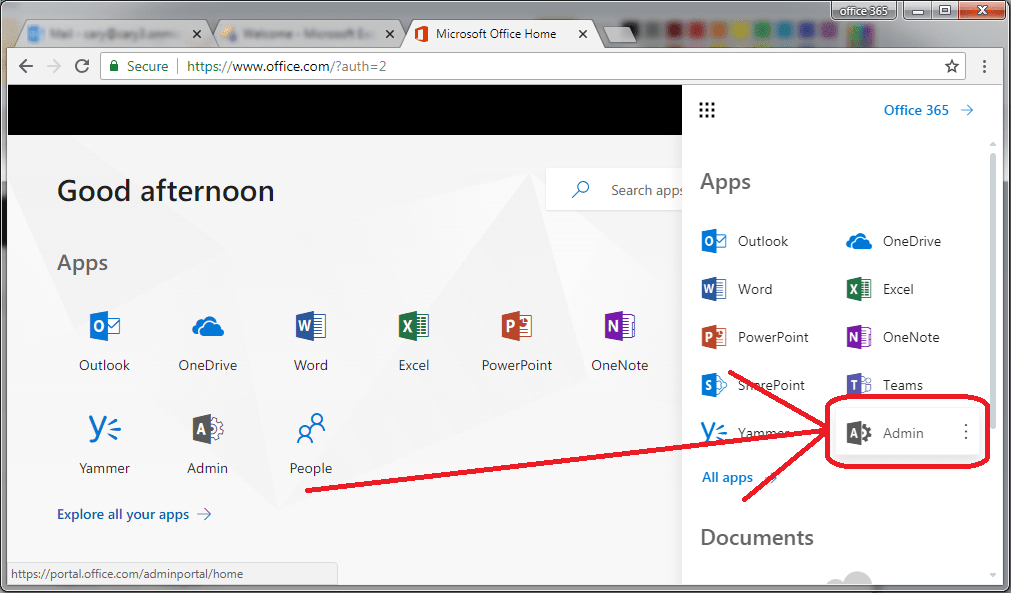
- Now you have to click on the ‘Admin’ tab that will open the Admin Panel in your screen
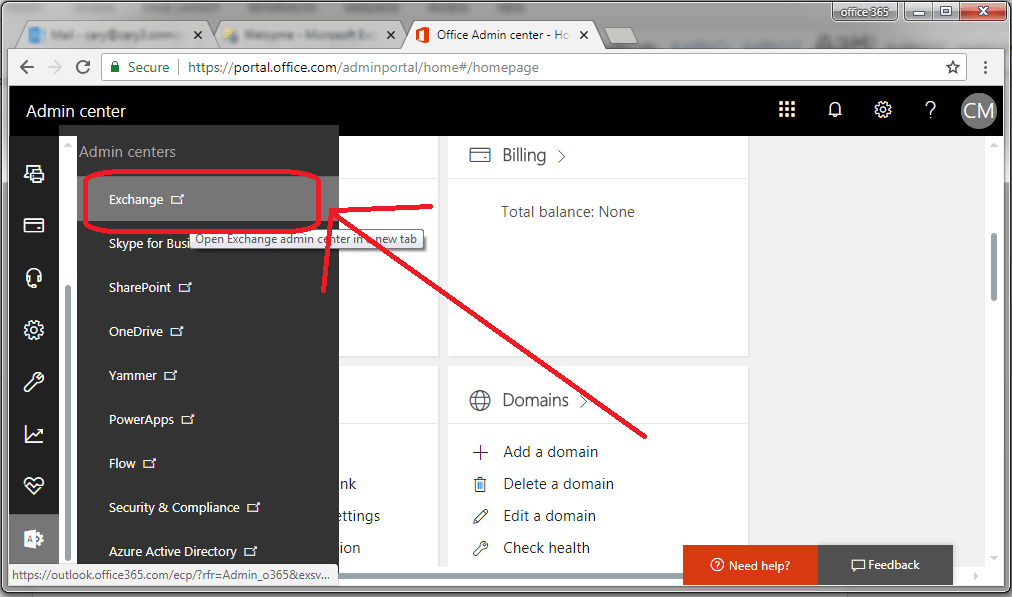
- Now you will have the Admin Center in front of your screens
- From there, you now have to switch to ‘exchange admin center’. For this you have to click on ‘Exchange’ that will present in the bottom-left corner
- Now go to ‘Recipients’. There you have to click on any user that will grant him complete access permission of the mailbox of another user. For eg: you can grant User12 complete access permission for the mailboxes of User 11.
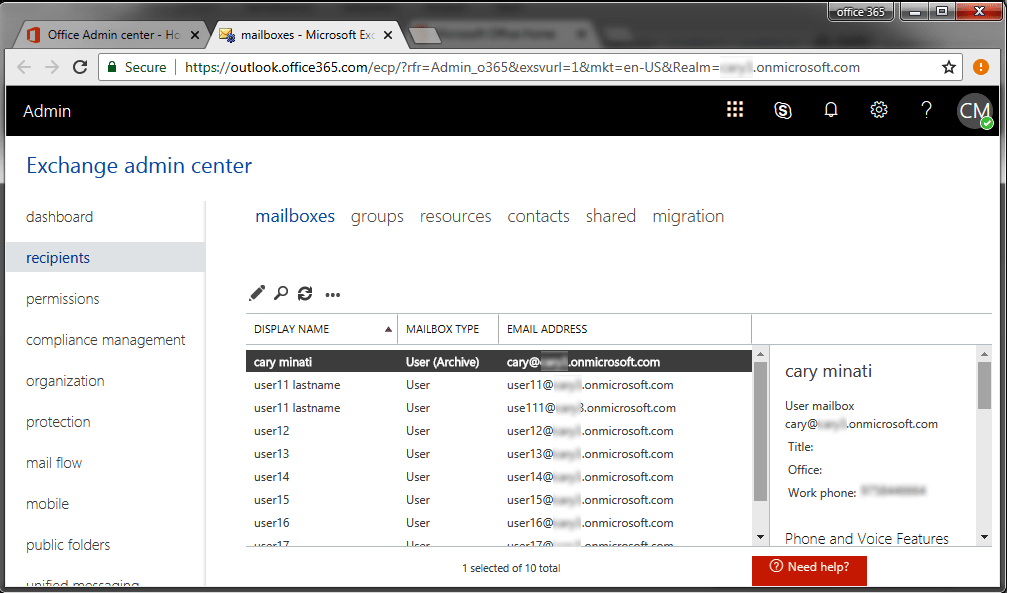
- Now Double click on the selected user that will open “Edit User mailbox” tab
- Once you see this dialog bar, head towards the ‘mailbox Delegation’ tab that will be having three different types of access permission, i.e. Send as, Full Access and Send on Behalf.
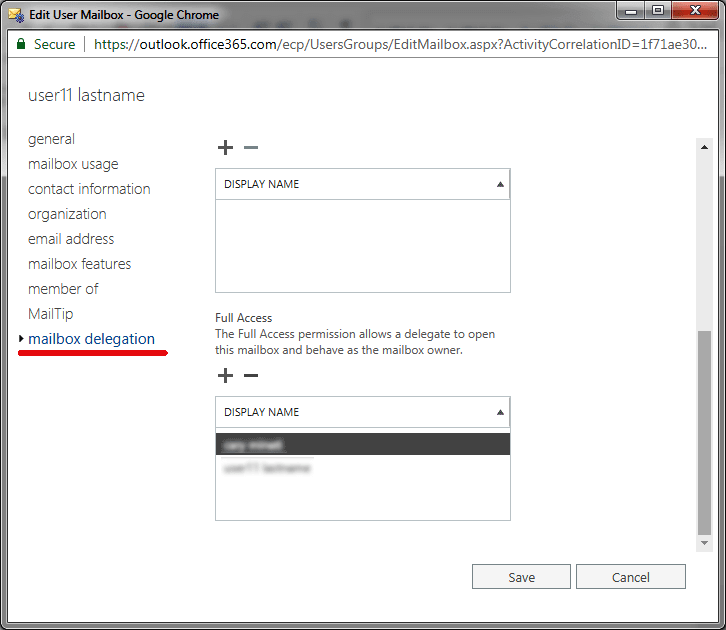
- You have to select the option, ‘Full Access Permission’, and thereafter click on the plus (+) sign.
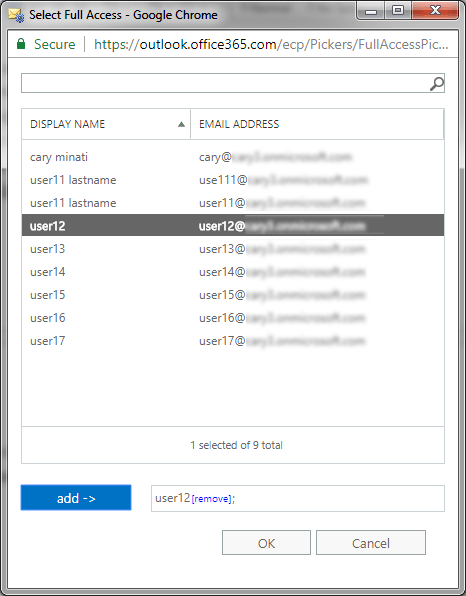
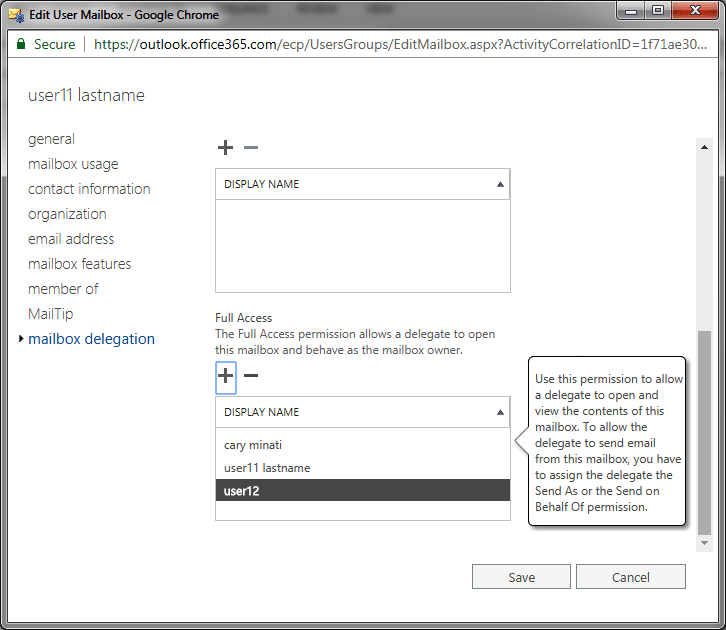
- Once done, you have another dialog box in front of you where you have to select the user to whom you want to give the complete access permission of the mailbox of another user. There is no limit on selecting any number of users whom you want to give complete access permission of the mailboxes.
- Now, Click on the ‘Save’ and exit from there.
If you have followed all the above mentioned steps carefully, then by now you would successfully executed the task of granting complete access permission to one or multiple users.
The above mentioned method and its steps might sound very easy to you. However, there are many more factors that you might have to consider to grant full access permission to another user. In case, you want to give the complete access permission of all the users to just one user, using this method won't be an ideal option. This is because you would have to select every mailbox manually that will eat up all your time in case you are planning to migrate more than 500 mailboxes at once.
Let us discuss another method for this purpose.Method 2 : Using Exchange Cmdlet :
- The first step is to use Add-MailboxPermission cmdlet that will help you to grant complete access permission. Go to AccessRights parameter, there you have to pass FullAccess
- For example : in case you wish to grant complete access permission of one user's mailbox to another, cmdlet will be:
Add-MailboxPermission –Identity "user12" -User "User11" –AccessRightsFullaccess
You can perform the above mentioned steps to fulfill your requirement. However, giving complete access permission manually might consume most of your time. Because of this, you might be not able to identify the mistakes you did while executing this manual process.
Method 3 :
Softaken has come up with an amazing freeware solution. Apart from being free, this software helps you to grant complete access permission to all the mailboxes through an automated process where all you have to do is sit and watch.
Softaken Mailbox Access permission managers not just allows you to eliminate all the complex steps of granting complete access migration, it makes your work very easy.
All you have to do is install this easy software. Once you have the software handy, you need to follow the below mentioned instructions.
Step 1 – Make sure you enter all the credentials of the Office 365 admin user to who you want to give the complete access permission of the mailboxes.
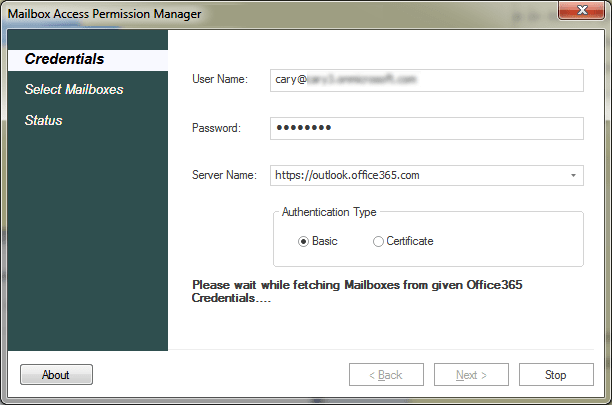
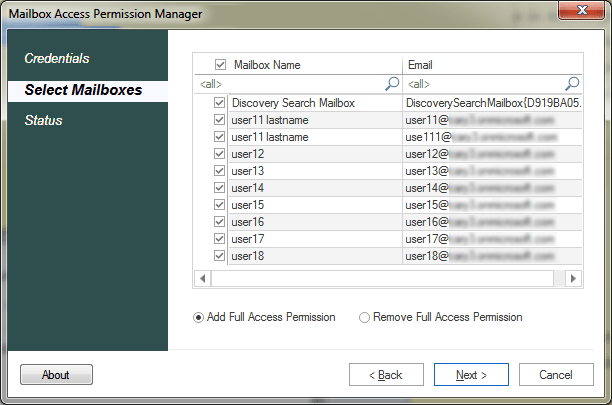
Step 2 – Now, a list will appear in front of your screen that will include all the users of the server. In this list, you can select the mailboxes that you want to migrate by giving complete access permission of these mailboxes.
Now you will have two options in front of you: 1)Add and 2)Remove. You need to select the option according to your preference. It will help you to add or remove the users you don't want to give access permission.
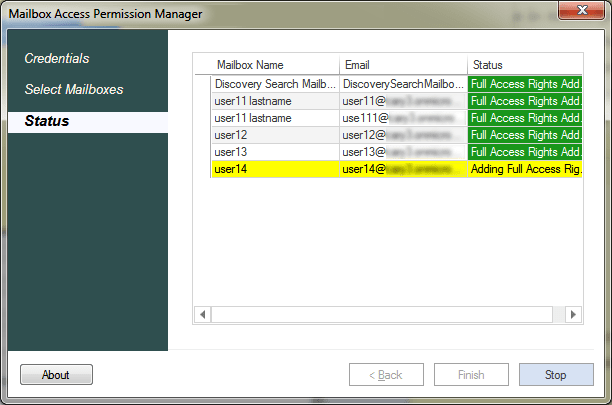
Step3 – Once done, click on the Next tab and your work will begin. You can monitor the working of this software in the real time by just sitting on your chair.
Related Blogs
- How to Export Exchange Mailbox to EML file Format?- Trusted Solution
- Ways to Extract Exchange Mailboxes data From EDB Files- Sophisticated Solution
- Your mailbox has been temporarily moved to Microsoft Exchange Server – Solution
- Ways to Decommission On-Premises Exchange Server While Deploying in a Hybrid
- How to Restore Active Corrupt Exchange 2016 Database to New Server?