Office 365
How to Configure or Install Outlook Properly
Configuration of New POP3 Account in Outlook
There could be various reasons for getting the error of “Outlook NOT installed/configured properly”
- Installation of Outlook is not failed
- Outlook is not organized for POP3 account
- Outlook is organized for IMAP or Exchange
- You might have deleted the Outlook files from the PC without closing them from Outlook
In case users are going through the above mentioned problems they should consider configuration of a new POP3 account.
Installation of MS Outlook
Step 1
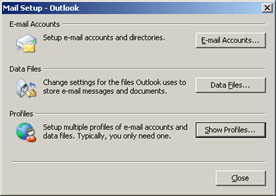
To follow this, all you need to access ‘Mail Setup’
Move the cursor to ‘Start >> Settings >> Control Panel, double click on Mail icon. The step will open the Mail Setup icon.
Step 2
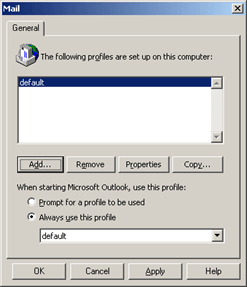
Then the screen displays the profiles created on your PC. It may possible that the mail icon takes up the profile that is already in the system by default. Ignore it and create a new account by clicking ‘Add’
Step 3
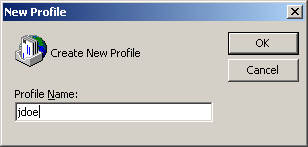
A new small window of Outlook asks you to provide your choice profile name. Give a unique name and then press ‘Ok’.
Step 4
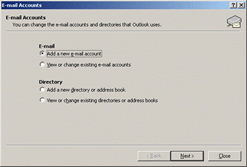
Checkmark the option ‘Add a new email account’ and press ‘Next’ tab
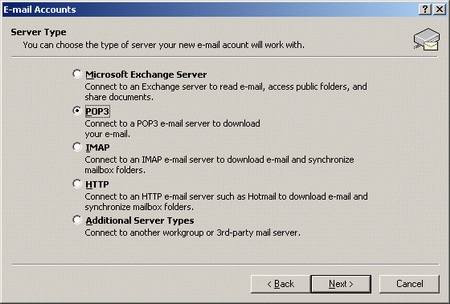
Step 5
Now choose POP3 and the cursor to press ‘Next’
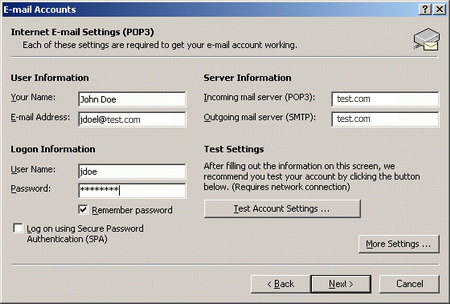
Step 6
Fill out the necessary information. Provide your email address along with a POP3 incoming/outgoing mail server.
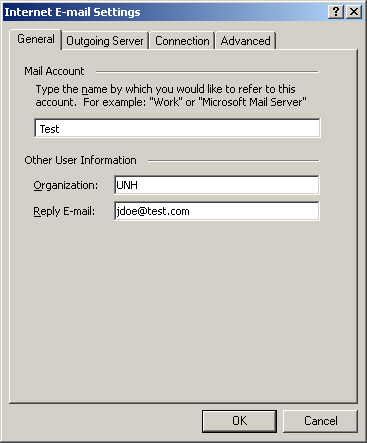
Step 7
The wizard, you can enter a different reply mail address or your Test mail address. Then press the tab ‘Advance’
This will complete the Lotus Notes installation.
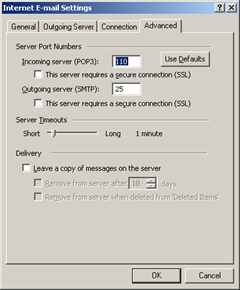
Step 8
The below picture shows what the tab will feature. Match your email setting with the picture email setting. If it is matching, click the ‘Ok’ button, it will take you back to the prime setting window.
Step 9
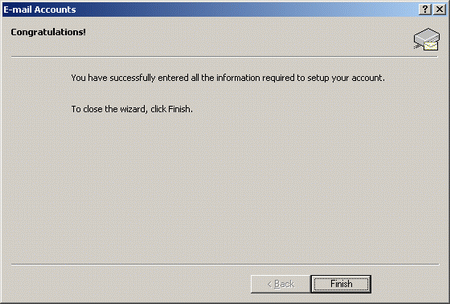
The below mentioned wizard will open while you are done with the settings and the test is over. The window will keep you notice that your profile has been setup. Finally, hit the tab ‘Finish’.
Step 10
While you get back to this window, make sure the tab always use the new profile you have created. Click ‘Ok’
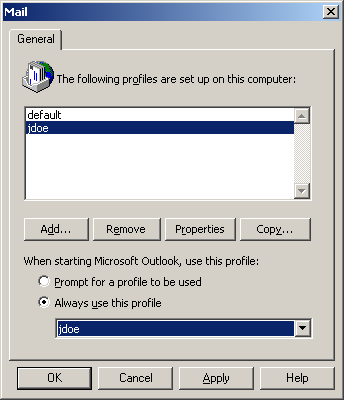
Click ‘Ok’ and click ‘Next’, then ‘Finish’.