Summary: Facing this error ‘iPhone cannot connect to iTunes’ on your iPhone or iPad, then this article provide all the probable solutions to fix this error.
Can’t find your iPhone or iPad in iTunes under device list? OR
Are you getting any of the messages discussed below while trying to access iTunes on your PC or Mac?
- iPhone cannot connect to iTunes on Mac
- iPhone can’t connect to iTunes because the value is missing
- iPhone can’t connect to iTunes because it is locked
- iPhone can’t connect to iTunes do not have permission
- iPhone cannot connect to iTunes 0x8e800000a
- iPhone cannot connect to iTunes unknown error
- iPhone cannot connect to iTunes invalid response
- iPhone cannot connect to iTunes on computer
- iPhone cannot connect to iTunes error 0xe8000015
10 different solution to resolve ‘iPhone cannot connect to iTunes’
- Restart your PC
You can resolve this error by simply restart your system and then connect iPhone and access iTunes.
- Ensure good internet connectivity
Make sure to have continuous internet connectivity with good transfer speed for the system and iPhone.
- Apply USB Cable
Use the OEM cable which you received with your iPhone or iPad. Or you can use other compatible USB cable.
Also, check that the USB port should work properly.
- Update iTunes
Use the latest edition of iTunes. This will improve the performance of the app and fix issues like iPhone not connecting to iTunes.
To update iTunes on Windows system, open iTunes. Go to menu and click Help and then click check for updates.
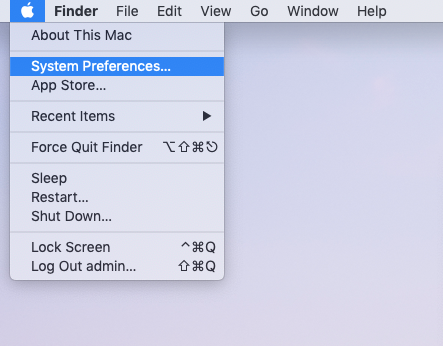
On Mac, update Mac OS to get the latest edition of iTunes. Click on Apple icon on Mac desktop. Select and then click on System Preferences and then click on Software Update.
5. Update Apple USB Driver
You may get this error when Apple USB driver is not updated or installed on the system.
Here are the steps for updating Apple USB Driver –
- Disconnect iPhone from your PC. Unlock your iPhone and go to Home screen
- Reconnect iPhone with PC. If iTunes open, close it.
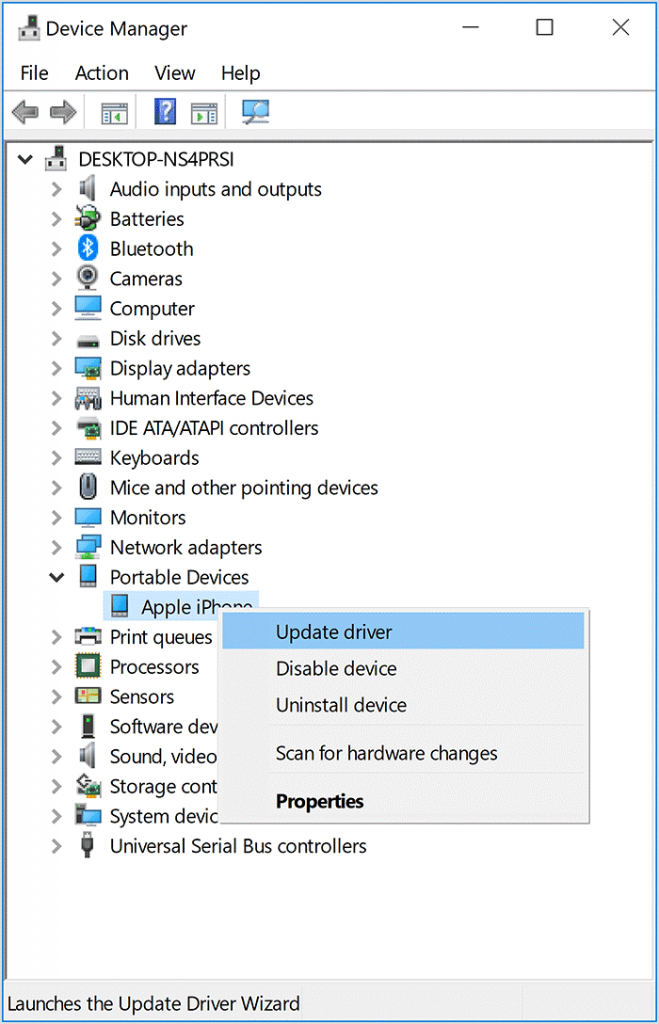
- Now, right-click on Windows start button and select Device Manager
- Locate and expand Portable devices
- Right-click on connected Apple iPhone and choose Update driver
- Select Search automatically for updated driver software
- Once the installation gets completed, go to Windows Settings, click on Update & Security and then click on Windows update. Verify no other updates are available.
- Now restart your system. Connect iPhone to it using USB cable and check whether iPhone show in iTunes device list.
6. Update to the latest iOS
Please ensure to have the updated to the latest iOS. Follow these steps to update-
On your iOS, go to Settings – General – Software Update to check the updates. If there are any, tap to download and Install. Now, restart your iPhone and the update process gets started.
Now, connect your iOS device to your PC and launch iTunes. The issue of connecting iPhone with iTunes should be fixed with it.
7. Use iTunes compatible OS
iPhone denies to connect with iTunes due to OS incompatibility. Ensure that your computer has iTunes compatible OS.
In Mac, iTunes require OSX 10.5.8 or later versions and in Windows, the latest iTunes is compatible with Windows 7 or later.
8. Disable Restrictions
Many times, this error occur due to the restriction settings that you have applied on your device. Remove the restrictions and try to access iTunes.
Follow the steps to disable restrictions on iPhone –
- Open Settings. Go to Screen Time and then click on Content & Privacy Restrictions
- Disable Restrictions
9. Trust the computer when prompted
If you get this message on iPhone “Trust this computer” after connecting iPhone to your system. Disconnect and reconnect your iPhone. Tap to Trust button. This will help you to fix your problem to connect iPhone with iTunes on Mac or PC.
10. Uninstall and Install iTunes
When iTunes does not recognize your iPhone or iPad and gives you the error “iPhone cannot connect to iTunes”, reinstall iTunes to fix this error.
Steps to re-install iTunes on computer –
- Firstly, uninstall iTunes by following the steps –
Go to Start menu and open Control panel
Go to Programs, then Programs and Features and then click on iTunes.
Click Uninstall
- Uninstall all related software from Control Panel like Apple Software Update, Apple Mobile device support, Apple Application Support 32-bit, Apple Application Support 64-bit, and Bonjour.
- Now, restart your system
- Re-install the latest edition of iTunes from Apple’s website or Microsoft Store
Conclusion
With this article, we have explained 10 solutions by which you can fix iPhone cannot connect to iTunes’ error. Try them and we hope that your problem will surely resolve with these solutions.