Here is good news for all those who are using SharePoint 2010 and now looking to convert from SharePoint 2010 to 2013. SharePoint is a server-based collaborative platform. The Microsoft product was first launched in 2001 and found greater response for its users. Since Microsoft has not stopped the tool. It has brought improvement in its features. The 2010 SharePoint version has been liked by its users. Organizations have found it a secure place to store, organize, and share information with any device. The 2013 SharePoint version has been launched which is an upgraded version of SharePoint 2010. If you want to continue the platform, switching from the 2010 to 2013 version can be profitable. It has taken the experience of users beyond imagination. It is getting popularity among users.
Here is good news for all those who are using SharePoint 2010 and now looking to convert from SharePoint 2010 to 2013. SharePoint is a server-based collaborative platform. The Microsoft product was first launched in 2001 and found greater response for its users. Since Microsoft has not stopped the tool. It has brought improvement in its features. The 2010 SharePoint version has been liked by its users. Organizations have found it a secure place to store, organize, and share information with any device. The 2013 SharePoint version has been launched which is an upgraded version of SharePoint 2010. If you want to continue the platform, switching from the 2010 to 2013 version can be profitable. It has taken the experience of users beyond imagination. It is getting popularity among users.
If you are really interested in integrating the 2013 SharePoint, the article will surely help you.
Here is a list of some pre-requisites of SharePoint 2010 before exporting to SharePoint 2013-
- It is necessary that your SharePoint farm is updated or has the latest service packs
- Document farm configuration settings in SharePoint Server 2010
- You need to change the web app from classic to claim mode on your SharePoint 2010
- Free up the app from unnecessary apps, delete an unused site collection, remove orphaned users, and remove the features that the latest versions are not supporting.
- Confirm the server connection before creating backup
Note: Kindly pay attention to the fact that there is no direct way to upgrade from one SharePoint to the other. Therefore, the only way you are left with is migration. You are not allowed to re-use the existing Hardware when you upgrade. At the same time, you cannot install both versions on the same system.
Quicker Method
The quicker method to export from one SharePoint to another is to use a third-party migration solution. Choose a reliable third-party program for conversion that has got the best ratings and positive reviews.
Here are some manual steps that you can follow for conversion.
Steps to Follow to Export from SharePoint 2010 to SharePoint 2013
Step 1: Creating New SharePoint 2013 Farm
The foremost step for conversion is the installation and configuration of the SharePoint 2013 farm. Setup all farm configurations in source SharePoint 2010 farm. It covers all essential configuration elements such as managed pats, AAM, email settings, and more. Now, ready to install all features of SharePoint 2010 to SharePoint 2013 such as language packs. Make sure you are not trying to install the feature that doesn’t get support from SharePoint 2013. Now, create a web app for SharePoint 2013 that should be a copy of the web app SharePoint 2010 farm.
As you are going to use the existing content database of SharePoint 2010 on SharePoint 2013, it is better to delete the content database from the new web app that is used for SharePoint 2013. If you don’t delete the new database, while running the app it can lead to the orphaned site issue. It occurs because the root site collection is in both the content databases that can cause conflict.
Step 2: Creating Backup of SharePoint 2010 to SharePoint 2013 SQL Server
The next step needs you to collect or backup the SharePoint 2010 data and after that, restore the data to SharePoint 2013’s SQL Server.
You can achieve the restoration and backup in two different ways- using central administration or PowerShell cmdlet.
1:– With the help of central administration: All you need to retrieve data from the targeted web application and develop a list of all source content databases from central administration.
Here are the steps to follow on how to collect the data of SharePoint 2010-
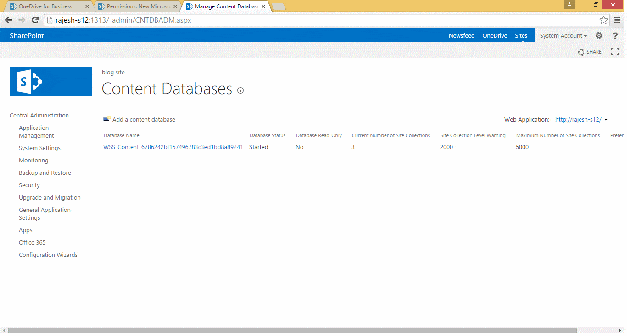
First, go to Central Administration and then Application Management and then Manage Content Databases
2:- With the help of PowerShell cmdlet, you can able to extract the data of the targeted web application.
Use the following syntax-
Get-SPContentDatabase -Web Application “” | Select Name
Create Backup
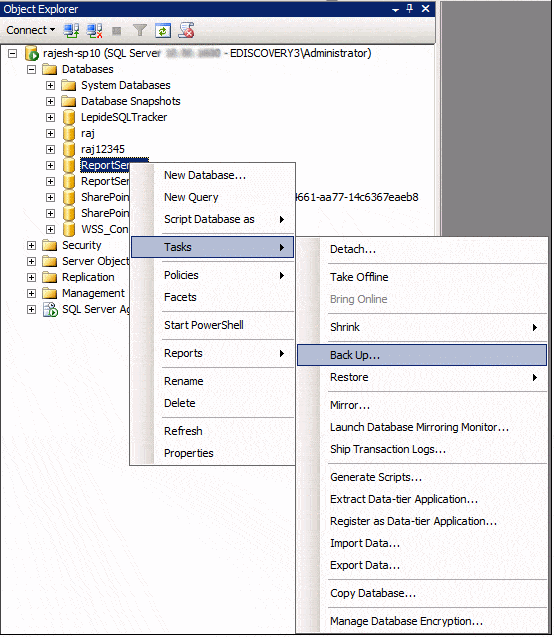
For backup of the SharePoint 2010 SQL Server data, you need to sign in to the SQL server box of the version. After that, access SQL Server Management Studio to expand the database node.
Restoration of Data
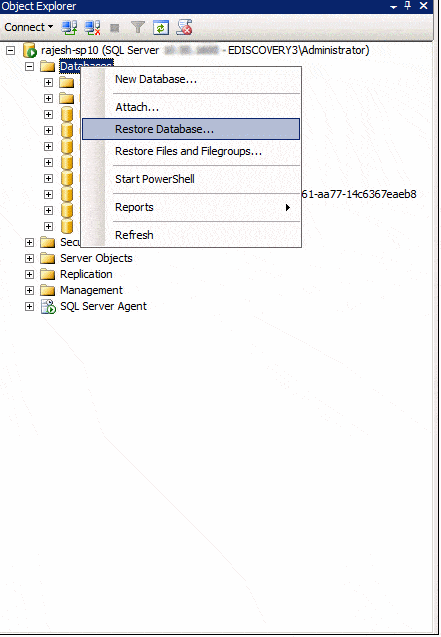
After creating a backup of SQL Server 2010 SharePoint data, restore the SharePoint 2010 databases to SharePoint 2013 SQL Server. In this step, you need to copy all necessary files to transfer to SharePoint 2013’s SQL Server database. As you copy the data, immediately open the SQL
Step 3: Verification of Data with Test-SPContentDatabase
Test-SPContentDatabase cmdlet and get ready for scanning of the web app data to find out any problem.
For this, you are allowed to use the syntax:
Test-SPContentDatabase -Name -WebApplication
The syntax can keep you alert against any issue like orphaned sites, wide lists, and missed features.
Step 4: Running “Mount-SPContentDatabase” for Attaching Data to SharePoint 2013
As you fix all types of errors with Test-SPCContentDatabase, the next step requires you to attach the 2010 SharePoint web app data to SharePoint 2013 web application. Attach the root site collections database in the initial step. In case, you are exporting ‘My sites’ it is necessary to migrate the host first.
Follow the given syntax-
Mount-SPContentDatabase -name “Database name” -DatabaseServer “Database Server Name” -WebApplication “Web-App-URL” -confirm: $false
Ass you attach the web app data you can access the data in SharePoint 2010.
Step 5: Upgrading Site Collection to Convert Data
The final step you need to follow is to upgrade the site collection. Once the conversion is occurred by default, it will export the collection to SharePoint 2010 with its old appearance. Now, you have to export all site collections to the latest version of SharePoint. It can be achieved through Site Collection administrators as you click on the links that you can get from the upgrade reminder box.
Getting the Upgrade Result
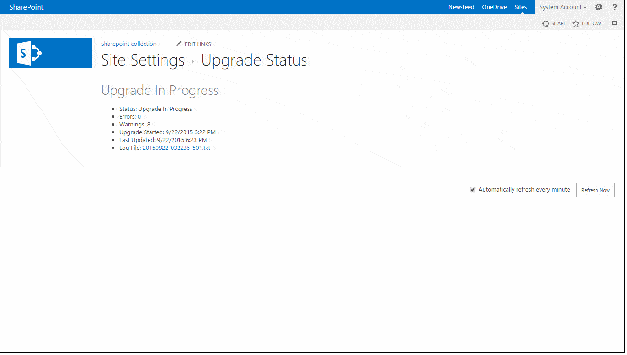
If you have a large number of site collections on the particular content database, you will have to wait and watch for the migration process. The status of the upgrade will automatically display on the screen.
Follow the steps-
Go to Central Admin and then Upgrade and Migration and then look for the status
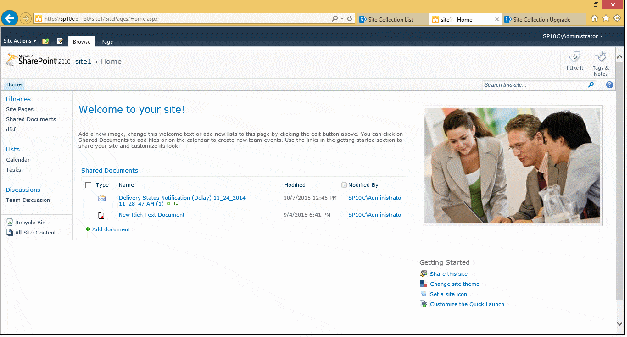
The Final site after site collection upgrade:
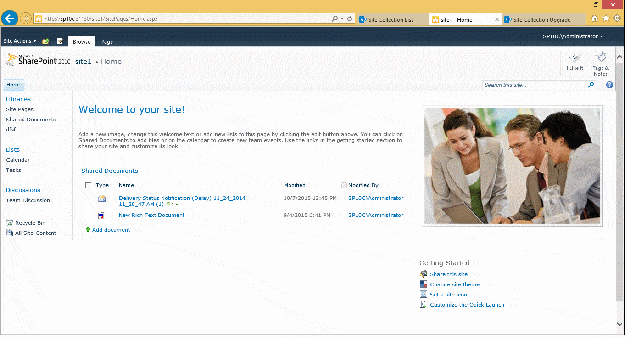
Thus you can achieve the upgrade process from SharePoint 2010 to 2013. The manual migration method has some limitations that you should be aware of before proceeding.
- Don’t offer support to granular conversion
- A lengthy process that consumes time.
- Need knowledge of several PowerShell commands to verify the content
- Prevent you to export unlimited data
- May develop confusion because of several tough steps
- Your data at risk because of several steps
As you can see the manual method needs several steps and can consume time, it is good to ask for help from technicians or use a third-party conversion tool that supports migration. Choices are all yours. It depends on your needs and how you want to export data.
Use Sharepoint Recovery Software to recover Sharepoint Data quickly